详解HTML5 canvas绘图基本使用方法(8)
|
值
描述
下面是一个小示例,可以通过点击改变组合效果: <!DOCTYPE html> <html lang="en"> <head> <meta charset="UTF-8"> <title>图形组合</title> <style type="text/css"> #canvas{ border: 1px solid #1C0EFA; display: block; margin: 20px auto; } #buttons{ width: 1000px; margin: 5px auto; clear:both; } #buttons a{ font-size: 18px; display: block; float: left; margin-left: 20px; } </style> </head> <body> <canvas id="canvas" width="1000" height="800"> 你的浏览器还不支持canvas </canvas> <div id="buttons"> <a href="#">source-over</a> <a href="#">source-atop</a> <a href="#">source-in</a> <a href="#">source-out</a> <a href="#">destination-over</a> <a href="#">destination-atop</a> <a href="#">destination-in</a> <a href="#">destination-out</a> <a href="#">lighter</a> <a href="#">copy</a> <a href="#">xor</a> </div> </body> <script type="text/javascript"> window.onload = function(){ draw("source-over"); var buttons = document.getElementById("buttons").getElementsByTagName("a"); for (var i = 0; i < buttons.length; i++) { buttons[i].onclick = function(){ draw(this.text); return false; }; } }; function draw(compositeStyle){ var canvas = document.getElementById("canvas"); var context = canvas.getContext("2d"); context.clearRect(0, 0, canvas.width, canvas.height); //draw title context.font = "bold 40px Arial"; context.textAlign = "center"; context.textBasedline = "middle"; context.fillStyle = "#150E0E"; context.fillText("globalCompositeOperation = "+compositeStyle, canvas.width/2, 60); //draw a rect context.fillStyle = "#F6082A"; context.fillRect(300, 150, 500, 500); //draw a triangle context.globalCompositeOperation = compositeStyle; context.fillStyle = "#1611F5"; context.beginPath(); context.moveTo(700, 250); context.lineTo(1000,750); context.lineTo(400, 750); context.closePath(); context.fill(); } </script> </html> 读者可以点击标签来观察不同的组合效果,效果如下: 剪辑区域: clip()方法从原始画布中剪切任意形状和尺寸。 (编辑:ASP站长网) |
 MySQL IS NULL如何查
 最简单的创建 MySQL
 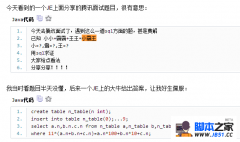 网上看到的给大家分享
 MYSQL教程MySql 5.6.3